When you buy through links on our site, we may earn an affiliate commission, Read More.
One day, my wife and I decided to go on a little adventure across the country in our RV. I had only recently purchased my RV after saving every bit of penny I could all these years. The saved-up money leading up to the RV proved to be worth it, until now.
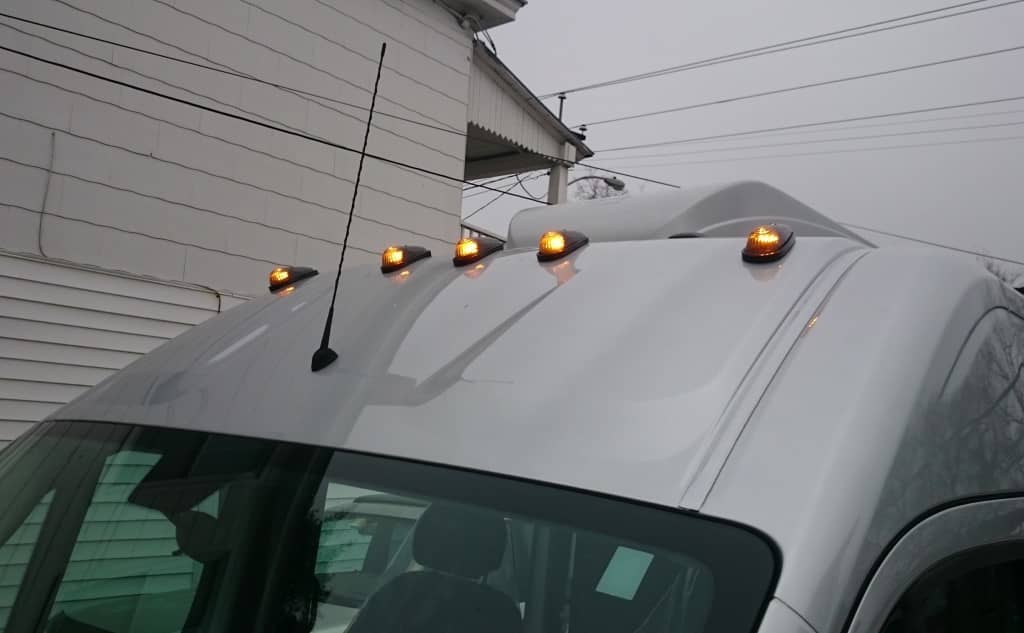
During one of our journeys, the roof marker lights decided to go out all of a sudden. So, why were the roof marker lights not working? As it turns out, the connector within the light that holds it shut to the roof had become loose. The lights could not get the necessary electrical energy required to power themselves. This issue can also lead to short circuits that might ultimately lead to fires.
Taking all things into consideration, I parked the vehicle on the side of the road and got to work. If you’re reading this article, chances are you are facing this issue too. So, keep reading!
Tools Required To Fix Roof Marker Lights
This simple issue can be solved with just household items. If you plan on fixing the lights yourself, you will need the following tools:
No products found.
List the problems with the roof marker lights not working
The following issues might cause why your motorhome marker lights not working:
- Loose connector
- Loose connection
- Burned-out bulb
Step-By-Step Solution To Fixing Cab Light Issues
1. Loose connector
A vehicle connector is generally an important part of the vehicle. The principal function of this connector is to link different physical components of the vehicle and to associate the vehicle with the outer components of the vehicle, such as roof marker lights, through the vehicle connector.
To check the condition of the vehicle connector, close the hood of the vehicle and mood-killer the motor. In the motor compartment, check for the running light connector, which is situated close to the front of the motor compartment.
Get to the piece of the gathering that contains the working lights. Screws are normally used to join light congregations to the vehicle. To dismantle the light body, a Phillips screwdriver is required. By setting the screws in a protected area, you can check the condition of the connector.
Solution
To replace a loose connector, follow the steps below:
- The principal thing you maintain that should do is eliminate the pink clasp within the bridle. It will generally slide out very easily.
- The dark hose that covers every one of the wires has a little clasp on it to keep it tight. Later on, it truly helps to take this off and remove the wires. You can eliminate it effectively with a screwdriver.
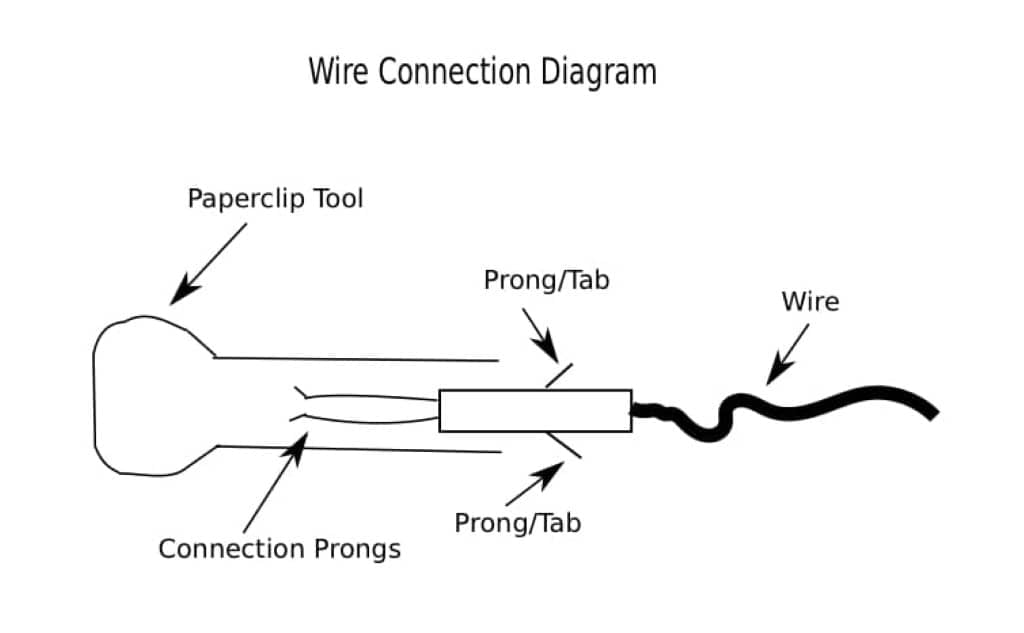
- Take your custom-made device and wedge it in on the two sides of the association pin.
- With your apparatus set up, pull on the wire from the rear till it discharges.
- When every one of the wires has been delivered you can twist back the tabs somewhat, so the wire will hold firm in your new connector.
- Push the pins once again into your new fitting with your fingers, or with pincers if that makes a difference.
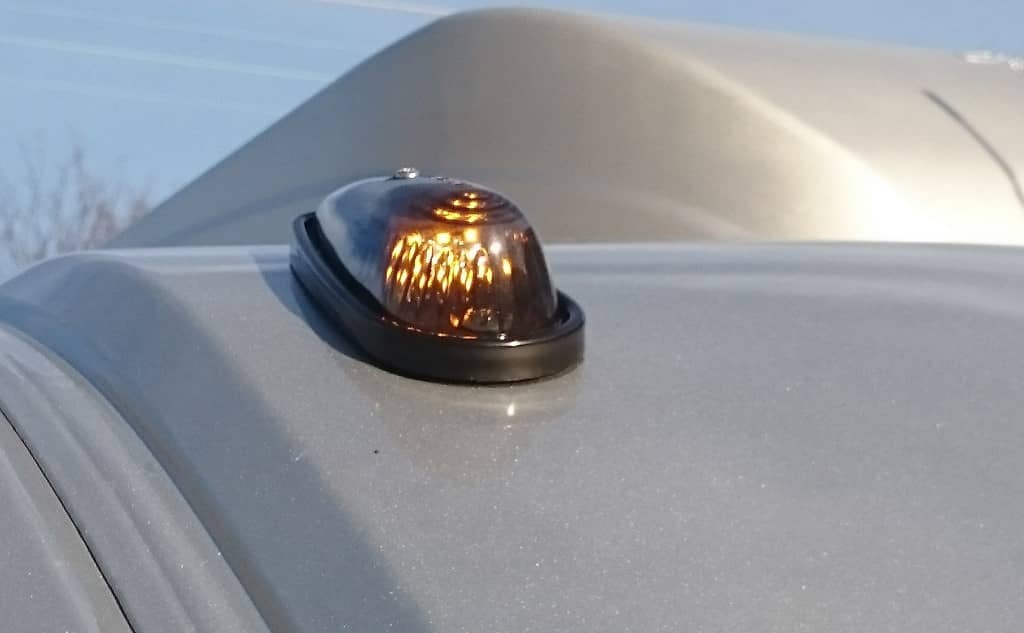
If you have difficulty recognizing the connector, see this image:
No products found.
2. Loose connection
Roof marker lights failure might be caused due to loose connection. After you’ve switched off the engine, close the hood firmly. Decide the area of the breaker enclosing the motor compartment. This part is for the most part generally tracked down promptly behind the battery.
Eliminating the breaker box cover from the vehicle’s motor compartment. Portage and Chevrolet’s cars are outfitted with a breaker box cover with a schematic showing each wire’s position inside the circuit box at the lower part of the cover. Find the wire named “DRL” which means Daytime Running Lamp and eliminate it from the circuit box.
The maintenance is finished after the “DRL” intertwine is taken out from the fitting attachment and supplanted with another circuit. To finish the establishment, supplant the cover on the circuit box and close your hood.
Solution
To remove the DRL fuse, follow the steps below:-
- Search for a circuit marked ‘Daytime’ or ‘DRL’. It will be a little or smaller than expected intertwined.
- Pull the DRL meld out and store it in a protected spot.
- This ought to assist you with separating daytime running lights in your vehicle. For wellbeing purposes, affirm that other electricals are as yet working.
No products found.
3. Burnt bulb
Eliminate the bulb utilized by the daytime running lights from the vehicle’s start framework. Normally, the separating system includes turning the bulb attachment clockwise to withdraw it from the gathering, then hauling the bulb out of it after the attachment has been pivoted in the other course.
Supplanting the glowing bulb with a more energy-proficient alternative is ideal. To finish the establishment, reinstall the unit into the vehicle and close the hood to get it. On the off chance that the daytime running lights are as yet not working accurately, a blown circuit might cause the issue.
Solution
To replace the burnt bulb, follow the steps as shown below:-
- Ensure you have the important supplies in general. You ought to ensure that you have every one of the fundamental supplies close by assuming you choose to freely deal with the circumstance.
- Switch off the electrical switch, light switch, and other fundamental stages.
- Ensure that your links are accurately covered, and mark the wires you’ll be chipping away at with electrical tape.
- Supplant the switch with another one.
- Following eliminating the light switch cover, you might discover that, given the aftereffects of your request, you’ll have to supplant the switch. This procedure comprises just a couple of straightforward strides to finish.
- To start, you’ll have to initially take the light change from the divider and spot it someplace safe.
- A screwdriver will then be utilized to secure the new light switch, ensuring that the wires interfacing with it are all a similar length as those generally joined to the current divider attachments.
- After finishing the link matching interaction, you can screw the new light switch cover into put on the divider.
- Turn on the power to finish the establishment cycle.
No products found.
Wiring Diagram of the clearance light
Trucks that are more than 80-inches wide are ordered to have taxi rooftop lights. The taxi lights’ motivation is to alarm cars moving in the opposite direction that a larger than the average vehicle is drawing nearer. And that’s why knowing the diagram of your vehicle’s roof marker light is very important. It might come in handy when you least expect it. For this reason, here is a link to the diagram.
No products found.
Federal government Regulations for roof marker light
Federal government regulations state that all lighting gadgets on engine vehicles set in activity after March 7, 1989, should meet the prerequisites of 49 CFR 571.108 essentially at the hour of production of the vehicle. Engine vehicles put in procedure at the latest March 7, 1989, should meet either the necessities of this subchapter or section 571 of this title as a result at the hour of production.
Understand your roof marker lighting violations
Roof marker lights violations represent right around 30% of all CSA infringements. In an unexpected turn, inoperable lights act as noticeable pointers that a truck’s general upkeep might come up short and go about as a solicitation to controllers to give the truck a careful review.
Pre-outing and post-trip investigations assume a critical part in regards to keeping away from CSA infringement. When it comes to trailers and farm haulers, drivers can save time and stress by checking for broken or inoperable lights.
No products found.
Frequently Asked Questions
1. For what reasons are my marker lights not working?
Your market lights might not work due to loose connector connections.
2. What are roof marker lights used for?
Roof marker lights are necessary by law and are used as a safety.
3. Are running lights and marker lights the same?
No, roof marker lights are placed on top of vehicles.
4. How do I turn my parked trailer lights on?
You can turn on your parked trailer lights by using the switches.
5. How do trailer clearance lights work?
The opportunity lights at the top, corners, and sides of colossal trucks and trailers help various drivers actually look at the size, region, and speed of your vehicle and hinder an untold number of incidents reliably.
6. Why are my trailer clearance lights not working?
Clearance lights are somewhat like roof market lights. They might not be working due to a burnt bulb.
Final Verdict
My wife stared at me in awe as I continued to fix the roof marker lights. Being a travel nomad, I know a lot about vehicles and easily fixed the roof marker lights. After thinking about the issue for quite some time, I realized that roof marker lights not working is rather a common issue. Thousands of people face this issue daily, even in the middle of the road.
Due to strict regulations, roof marker lights cannot go unnoticed. You must always keep them in check and functional, or else they might incur heavy fines. Roof marker light issues might also be potential harm to your life. So, get it fixed now!